

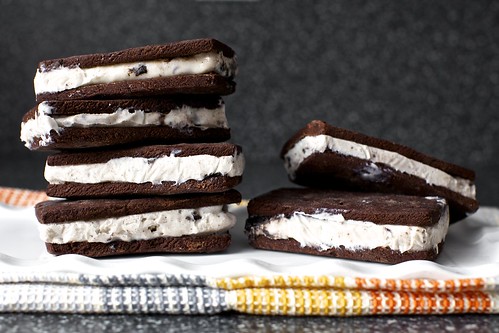
Yield: 12 2-by-4-by-1-inch ice cream sandwiches (24 cookies). However, I made 10 large and 10 miniature (1-by-1.5-inch) sandwiches because while I was baking the large ones, my son toddled in from his nap and announced “Mommy making cookies! For Jacob!” and I realized he probably didn’t need a cookie nearly the size of his head. I am so very mean.
If you have a favorite cookie cutter shape you’d like to use for these sandwiches, definitely use it. You can cut the cookies and the ice cream with it. You could perhaps even make, say, star-shaped ice cream sandwiches for a 4th of July-themed cookout. You know, if you’re not me.
Re, the cocoa weight below: Just about everyone on earth besides me finds that a cup of unsweetened cocoa powder weighs 80 to 85 grams. That’s what the number below is based on. However, I consistently find that my super-fancy Valrhona Dutch cocoa weighs in a bit higher, up to 5 to 10 grams more than you see below. So, you might nudge it up if you’re using the same.
Cookies
2 2/3 cups (335 grams) all-purpose flour
2/3 cup plus 1/4 cup (75 grams) extra dark or Dutch-processed unsweetened cocoa powder
1 1/4 cups (2 1/2 sticks or 285 grams) unsalted butter, softened
1 cup (200 grams) granulated sugar
3/4 teaspoon table salt
2 large egg yolks
1 tablespoon vanilla extract
2 2/3 cups (335 grams) all-purpose flour
2/3 cup plus 1/4 cup (75 grams) extra dark or Dutch-processed unsweetened cocoa powder
1 1/4 cups (2 1/2 sticks or 285 grams) unsalted butter, softened
1 cup (200 grams) granulated sugar
3/4 teaspoon table salt
2 large egg yolks
1 tablespoon vanilla extract
Filling
1/2 gallon (8 cups or approximately 1050 grams, weight will vary by brand/variety) ice cream, your choice of flavor (I used cookies and cream), softened
1/2 gallon (8 cups or approximately 1050 grams, weight will vary by brand/variety) ice cream, your choice of flavor (I used cookies and cream), softened
Preheat oven to 350°F degrees. Line two baking sheets with parchment paper. Sift the flour and cocoa together (I am generally too lazy to sift things but cocoa is really lumpy so don’t skip this) and set aside. In the bowl of a standing mixer with a paddle attachment, beat the butter, sugar, and salt together until light and fluffy. Add the yolks and vanilla and mix until combined, then scrape down sides and mix briefly again. Add the flour mixture a little at a time then mix until combined.
Transfer the dough to a lightly floured work surface and divide into two equal pieces. If the dough is too soft to handle, wrap and chill it until firm enough to roll out (I recommend 30 minutes only; any longer and it becomes crumbly to roll out). Roll each batch into a 1/4-inch thick rectangle, about 10 by 8 inches. Cut into a total of 24 2-by-4-inch rectangles.

Use an offset spatula to transfer the rectangles to the prepared sheets; you’ll only need an inch space between them. Use the tip of a thermometer (totally brilliant tip from Amy, by the way; it made far better indentations than skewers that I usually use for docking) to poke the cookies with holes (Amy recommends 14 holes but I used thisas my guide and made more).

Bake the cookies for 16 to 18 minutes, or until they stay firm when tapped in the center. Transfer to a wire rack to cool completely. Repeat with remaining cookie dough, rerolling scraps as needed.
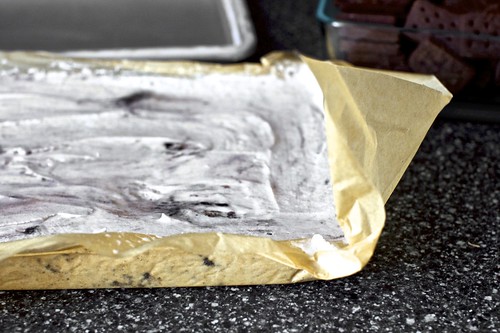
Meanwhile, line the bottom of a 9-by-13-inch pan with parchment paper, allowing it to overhang on two sides (it will act as a sling for the ice cream). Spread the softened ice cream into the pan, smooth the top and freeze until firm, about one hour (or longer if your freezer is as terrible as mine).
Run a knife along the exposed sides of the pan to loosen the ice cream. Holding onto the parchment paper, lift ice cream out of the pan and onto the work surface. Using one of the cookies as a template, cut ice cream into 12 2-by-4-inch bars. Strangely, I found using kitchen shears to go right through the ice cream and the paper underneath the easiest. I then flipped each piece of ice cream onto a cookie, peeled off the paper, and finished sandwiching the rectangle of ice cream with a second cookie.
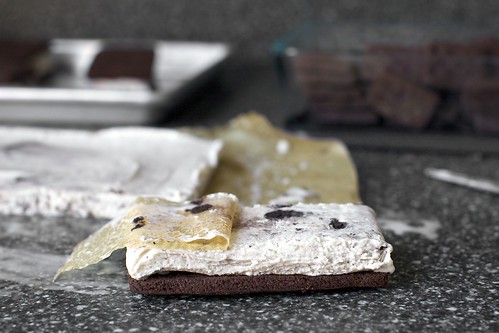
(Look, I’d be lying if I didn’t tell you that this whole ice cream part caused a spectacular mess in my kitchen. Huge! It was an ice cream massacre! But, I was rushing and you should not. If your ice cream begins to soften, just slide it back into the freezer for a bit and it will become easy to work with again. Promise. Do as I say, not as I did, unless you like sticky floors.)
Wrap each ice cream sandwich in plastic and please, again, listen to Amy here. I was all “Oh, let me just get them cold again and I’ll wrap them later.” Which was wrong. They continue to lose their shape for a bit, runny and melting, before they freeze up and that is why my sandwiches were kind of a mess. “Sealing” them into their shape immediately with plastic is, well, the reason that Amy is a sweets stylist and my food looks, uh, “handmade.”
Freeze until just before serving.
{All photos courtesy of Smittenkitchen.com}
That's pretty much the process we went through, except I didn't catch on to the whole "freezing icecream in a tray" part. :P But they did turn out very well, and, I believe, were a hit in our family! (I am still without a camera, but took a couple pictures on Daniel's phone)
.JPG) |
| Some of the cooked cookies....(wait--that sounds redundant. :P) |
.JPG) |
| hehe...this one was a bit messy, weren't it? |
.JPG) |
| But they were very tasty, all the same!!! :) |


Sounds great! I'll see what I can do to adapt them to gluten free.
ReplyDeleteI love your recipe posts, by the way!
Rachel and Sarah
ReplyDeleteI have found your blog through Maria Elisabeth and I LOVE it! My blog can be found here. :)
http://missemmawoodhouse.blogspot.com/
By the way... really loved this post and I think that I will try this recipe some time. :)
~Abilaine